How to Draw Hello Kitty
Learn how to draw Hello Kitty, the famous Japanese cat character from Sanrio, using three simple step-by-step methods.

How to Draw Hello Kitty: Introduction
Hello Kitty is one of the most recognizable media characters in the world and the most iconic creation of Sanrio. You’ve likely seen this cute white kitten as a toy, in cartoons, games, jewelry, illustrations, clothing, and many other interpretations.
In this step-by-step tutorial, I’ll show you how to draw Hello Kitty as accurately as possible, keeping her appearance close to the original design.
However, even with such a well-known character, there’s room for variation – the same figure can be drawn in several ways while staying true to the main concept.
To demonstrate this, I’ve included two additional versions of the tutorial that show alternative ways to draw Hello Kitty, with slightly different steps and small changes in her outfit.
Hello Kitty Drawing Tutorial
Materials
- Pencil
- Paper
- Eraser
- Coloring supplies
Time needed: 20 minutes
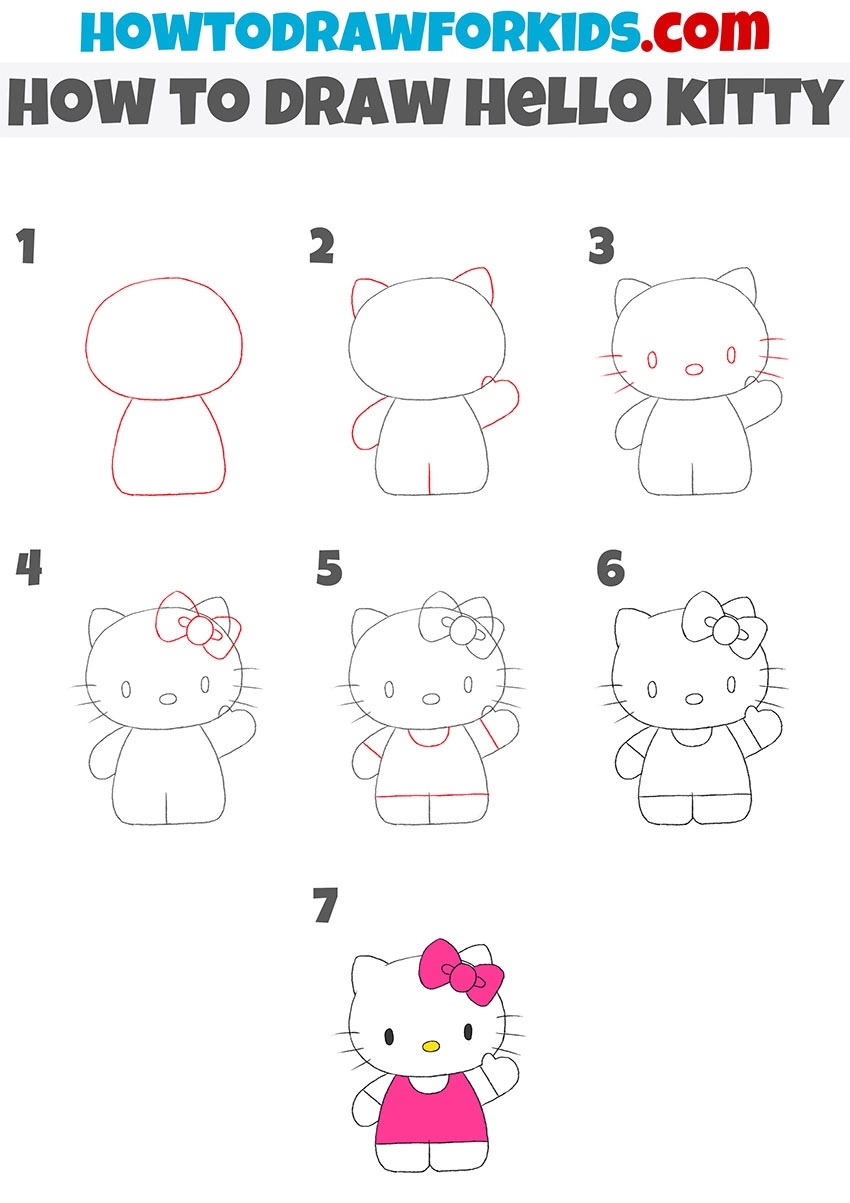
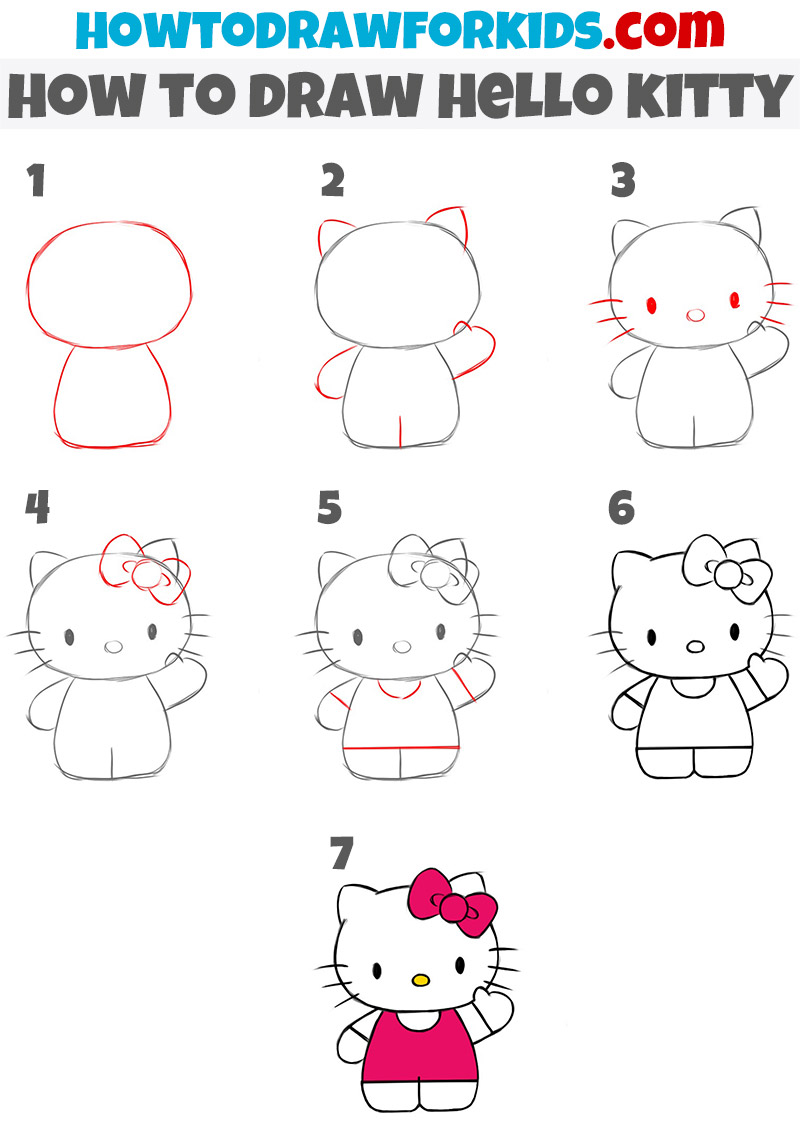
How to draw Hello Kitty step by step
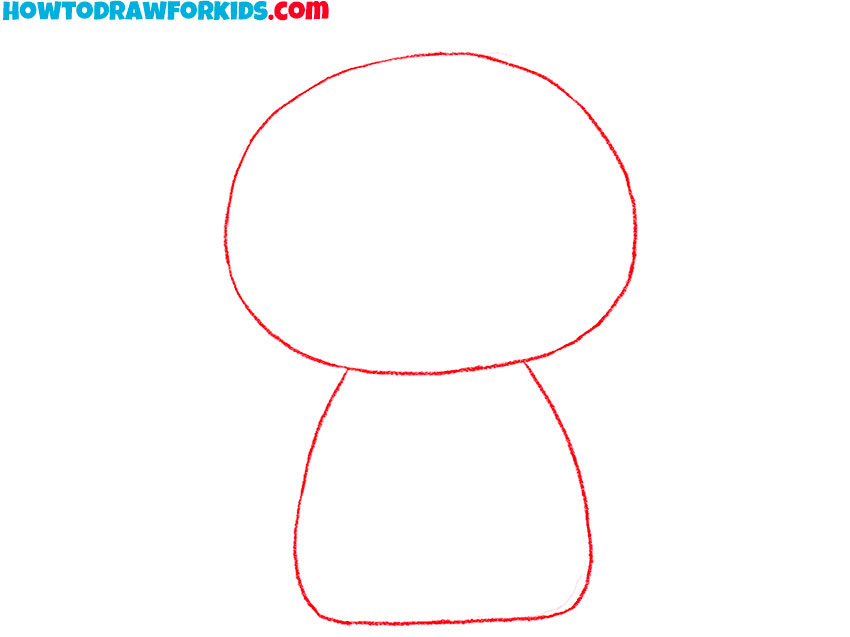
- Sketch the Sanrio character’s head and torso.
First, sketch the large head as a rounded wide oval. Under it, sketch the simple torso as a trapezoid with rounded corners, narrower at the top. Keep edges of the body parts smooth and even. Check the initial sketch for symmetry and proportions.
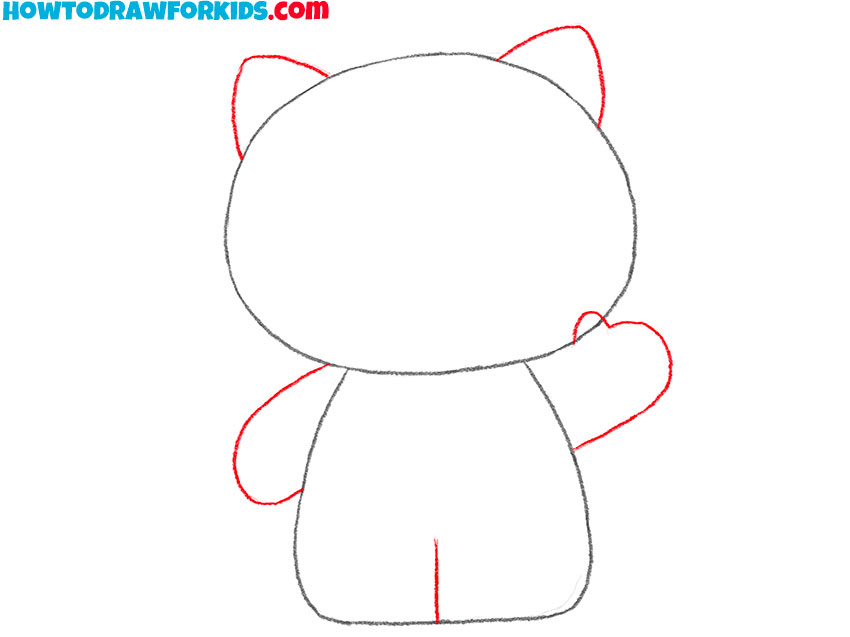
- Sketch the cat ears and arms.
Now, draw the cat ears as two soft triangles with curved sides placed at the top corners of the head. On the right side, sketch the raised arm of Hello Kitty as a bean-like shape attached to the torso. On the left, indicate the resting arm with a short curve tucked close to the body. Separate the legs with a vertical line.
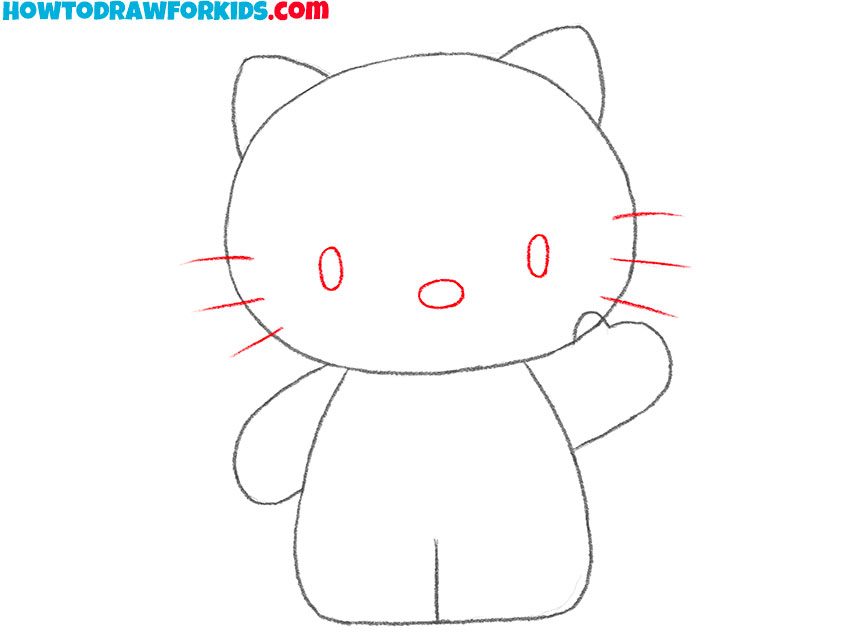
- Draw Hello Kitty’s eyes, nose, and whiskers.
Facial placement drives likeness, so position features with care. Draw the cartoon eyes as two vertical ovals set wide apart. Draw the nose as a small horizontal oval centered below the eyes, leaving equal spacing on both sides. Add whiskers as three short, straight lines extending from each cheek area.
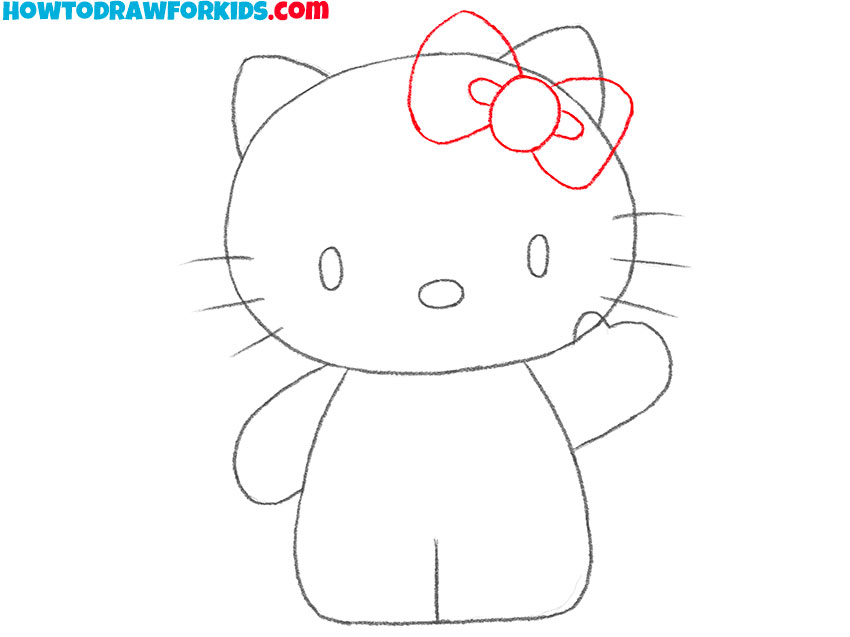
- Sketch the bow at the top of the cat’s head.
To draw the bow, sketch the central knot as a small circle near the top-left ear. From the knot, outline two rounded loops that resemble inflated petals. Add a slight inner fold line in each loop to make the bow look more convincing. Keep the bow slightly tilted.
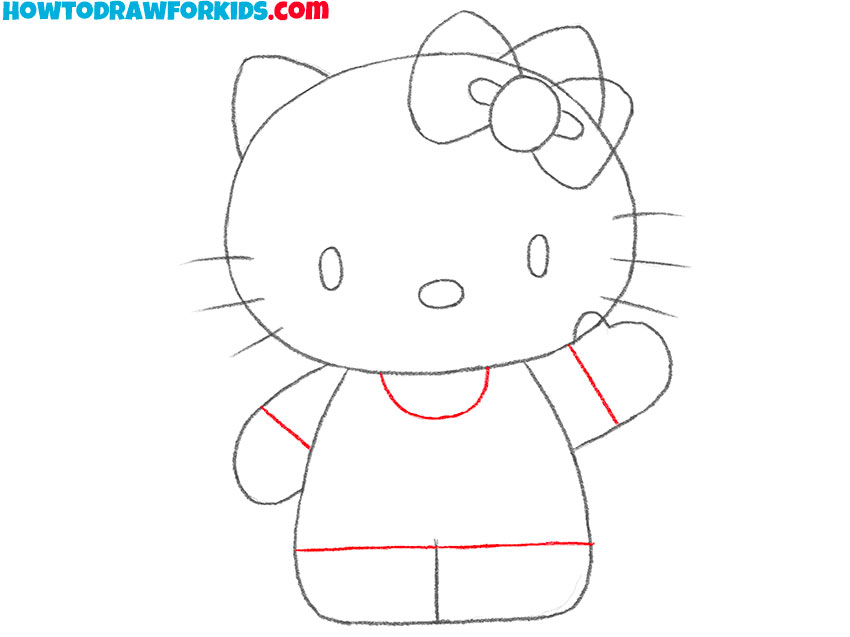
- Draw the clothes of Hello Kitty.
Now, mark the sleeves as two short lines wrapping around the wrists. Sketch the dress neckline as a shallow U-shape centered under the head. Add a horizontal edge across the lower torso to mark the hem band. Don’t use too detailed shapes, keep the drawing very simple.
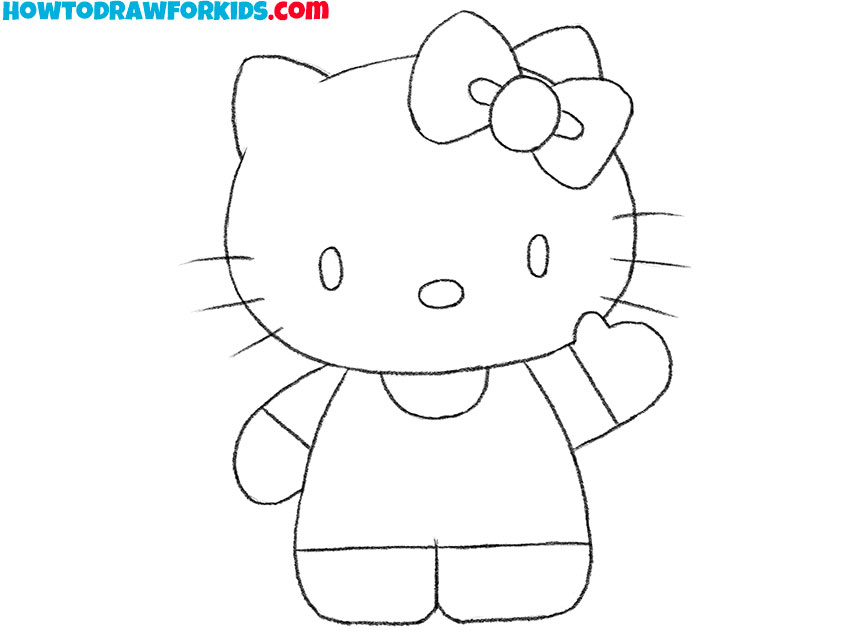
- Refine the contour and erase guides.
Clean edges and shapes are essential before color. Trace and darken the final outline of the Hello Kitty drawing Erase the temporary guides: any overlapping and extra strokes at the head and body. If needed, slightly thicken the outer silhouette.
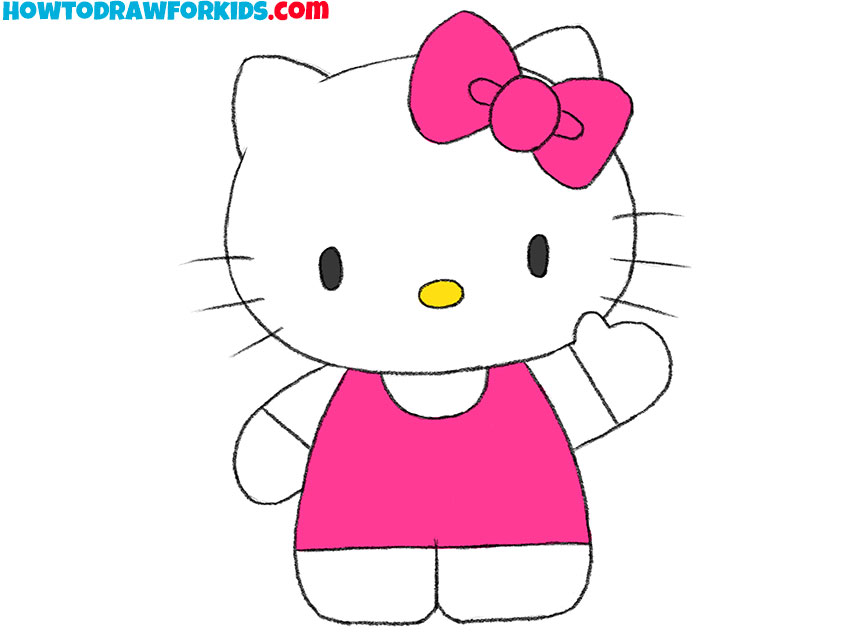
- Fill the Sanrio character with iconic colors.
Color supports the iconic look. Fill the head and body with a light off-white, or leave it white. Color the bow a bright pink or magenta. Shade the nose with a warm yellow. Keep the eyes and whiskers solid black. Fill the dress in a saturated pink.
Additional Content
And to make this Hello Kitty drawing tutorial even more convenient, I’ve prepared a special PDF version for offline use. It includes all the main drawing stages arranged in a clean, easy-to-follow format, so you can practice anytime without being online.
Inside, you’ll also find a few extra worksheets – a coloring page, a tracing sheet, and a grid-based drawing guide. This resource helps you revisit the tutorial, refine your technique, and enjoy improving your Hello Kitty drawings wherever you are.
Alternative Ways to Draw Hello Kitty
To complement the primary lesson, I’ve carefully created an alternate drawing technique for Hello Kitty, designed to further your practice and elevate your artistic prowess. In this variation, she dons a different attire, and her posture is more relaxed, standing with her arms gently resting at her sides, providing a contrast to the raised-arm pose of the first lesson.
Embrace this alternate method to explore a new facet of Hello Kitty’s charm. Perfecting this will not only give you another adorable drawing but also a broader understanding of how different poses and outfits can bring out varied aspects of a character. It’s a vital skill that will serve you well in all your artistic endeavors.
Easy Sketching Technique
Start by outlining Hello Kitty’s large rounded head and small oval body. Add short arms on both sides, one raised in a waving pose.
Sketch the small triangular ears on top of the head and mark simple facial details – two oval eyes, a small nose, and three whiskers on each cheek.
Draw a large bow above one ear using rounded shapes for the loops and a small circle in the middle. Below the head, illustrate the dress with a wide neckline and straight bottom edge.
Once the main form is clear, trace the lines neatly and remove any guidelines. Color the bow and dress in a bright pink shade, the nose in yellow, and leave the rest of the character white.
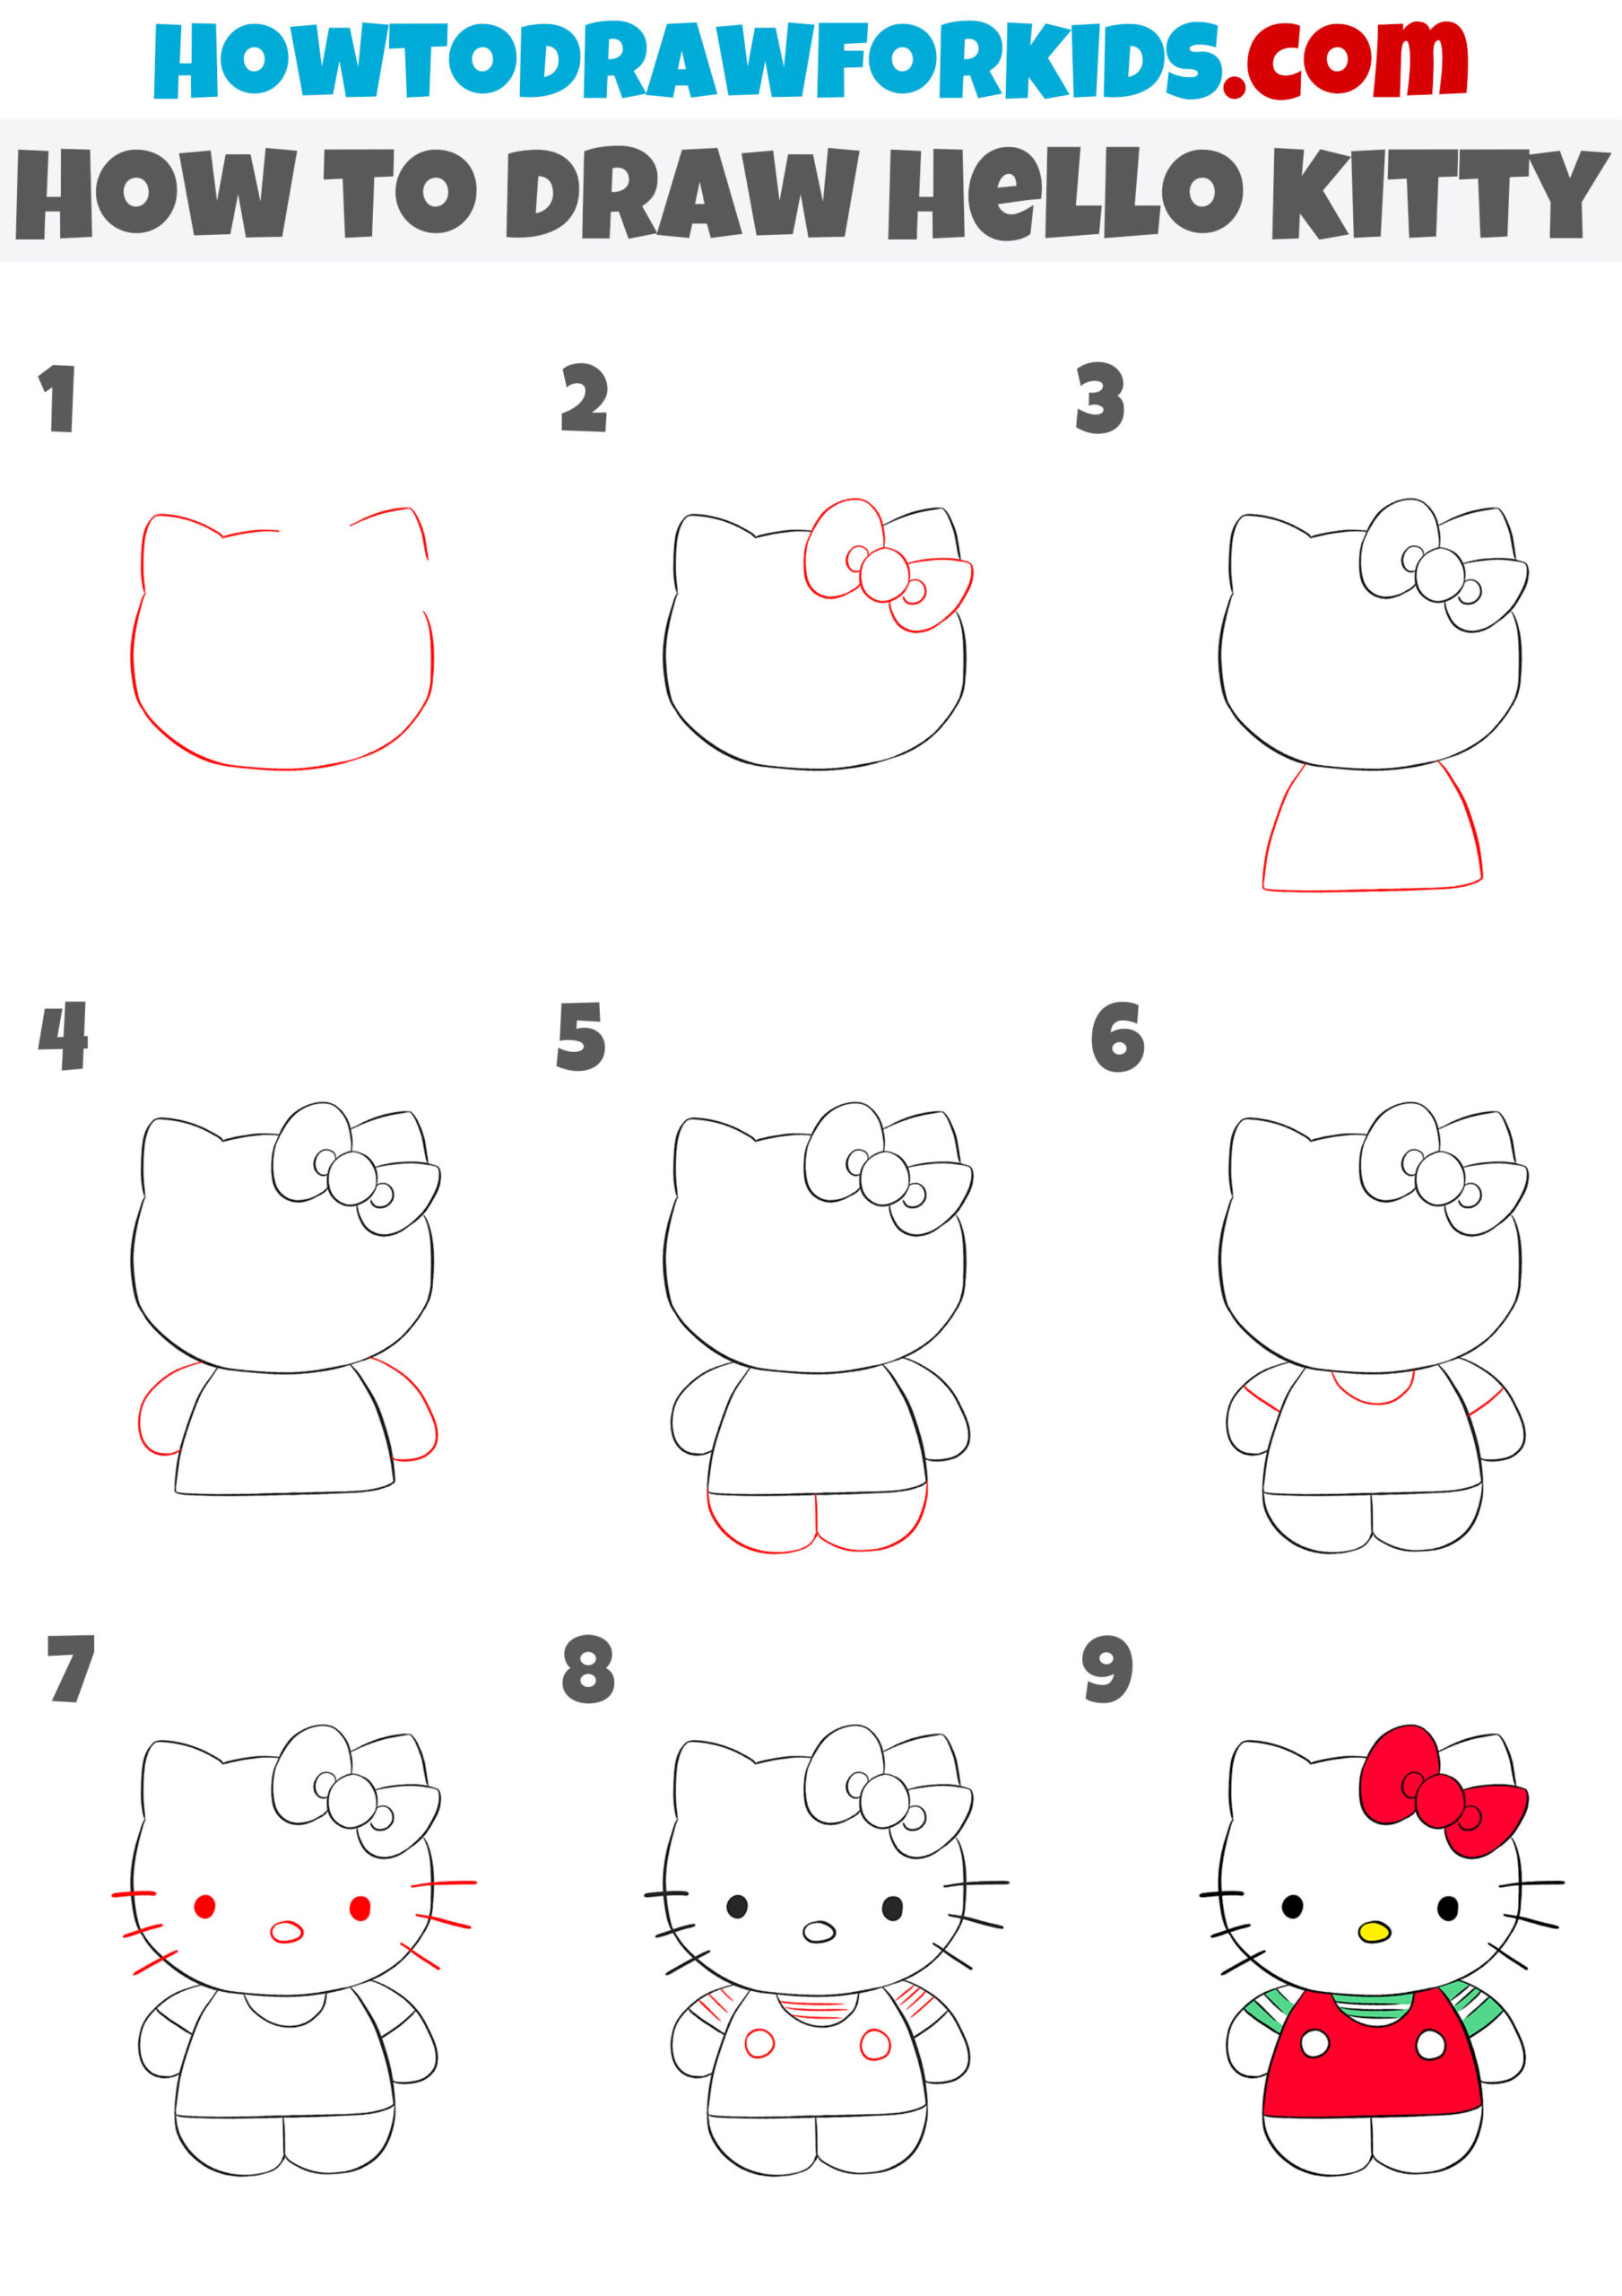
Alternative Sketching Method
Begin by outlining a large rounded head with small pointed ears at the top. Add a neat bow on one side of the head, forming two wide loops and a circular knot in the center.
Sketch a short, wide body under the head, followed by simple rounded arms and small legs with minimal detailing. Draw a curved neckline and sleeve edges to define her dress.
Next, place two tiny oval eyes close to the center, a small oval nose between them, and three straight whiskers extending from each cheek.
Add subtle details like the shoulder stripes and circular buttons to make the outfit look more unique. Finish by coloring the bow and dress red, the nose yellow, and the sleeves green.
Conclusion
Drawing Hello Kitty is a simple and enjoyable process, and now you can recreate this beloved character in three different versions that we explored in this lesson. Each version helps you understand how small changes in shape or details can create new and interesting results.
If you’d like to continue practicing and exploring more, visit my collection of Hello Kitty coloring pages – there you’ll find printables featuring this cute white kitten in various scenes and moods.
The Sanrio universe is vast, filled with many other charming characters, so I also recommend checking out my drawing tutorial on Kuromi, another popular Sanrio figure.
And if you’d like to improve your understanding of real animals while keeping the process simple, visit the cat drawing tutorial – it’s a great way to connect what you’ve learned here with more realistic forms.
Don’t forget to follow me on social media to stay updated with new drawing lessons and materials.
hello kitty draw paint super colouring
nice painting love the work.